
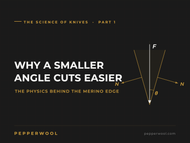
WHY A SMALLER ANGLE CUTS EASIER
Posted by Beren McKay on Jul 2nd 2026
Blade Geometry · Physics
Why a Smaller
Angle Cuts Easier
Every decision we made about the MERINO line started with physics. Not preference. Not convention. Physics. This is the first principle — and once you see it, you'll understand every grind choice, every steel choice, and every dimension in the knife differently.
The Science of Sharp — jump to any part
Part 1 · Why a Smaller Angle Cuts Easier — you're here
Part 2 · Why Sharp Stays Sharp
Part 3 · What Your Steel Will Allow
Part 4 · The Sharpening Angle (coming soon)
Part 5 · The Mediums (coming soon)
Part 6 · The EDC Sharpening Method (coming soon)
I've spent fifteen years designing knives. And in fifteen years, I've had this conversation more times than I can count: someone picks up a thin, acutely ground blade and says it feels almost too light, too delicate — and then they cut something with it and go quiet. Because the knife did almost nothing. The material just separated.
That's not magic. It's not the steel, at least not primarily. It's geometry. The shape of the edge determines how much of your applied force actually goes into separating material — and how much of it gets wasted pushing matter out of the way. Get the geometry right and the knife does the work. Get it wrong and you do.
This is the first post in the Science of Sharp series on the physics behind the MERINO line's design. We're deliberately starting at the simplest possible case — a single wedge, nothing else — and each part from here adds one more piece of the real world: wear, then steel, then the practical limits. If you understand why a smaller angle cuts easier, the rest of the decisions make sense.
Part One
A Blade Is a Wedge
A blade is one of the six classical simple machines. Specifically, it's a wedge — and a wedge is a machine that converts force applied in one direction into force acting in a different direction. When you press down on a blade, the wedge geometry converts that downward force into lateral force that pushes material apart along both sides of the edge.
The physics here is the same whether you're splitting wood, slicing an onion, or cutting rope. The more acute the angle at the edge, the more efficiently your applied force becomes separation force. A thin, acute edge slips through material because the material barely has to move to let it pass. A thick, obtuse edge forces material apart by compression — which means you're doing most of the work, not the geometry.
Mechanical advantage
of a wedge = 1 ÷ tan(half-angle)
At a 20° included angle (10° per side), the wedge gives you nearly 5.7× mechanical advantage. The geometry does most of the work. You provide the direction.
Use the diagram below to see this directly. Enter a downward force — say, 10 lbs — then move the angle slider and watch what happens to the separation force. Your applied effort stays the same. The geometry determines where that effort goes.
Interactive Diagram
Wedge Geometry & Force Vectors
Enter your downward force and drag the angle slider. The gold arrow is what you apply — the white arrows show what the geometry delivers. At 20° and 10 lbs in, you get nearly 57 lbs of separation force out. The angle is doing the work.
Test it at home — the pencil
This whole series has a test bench you already own: a pencil. Sharpen one to a long, fine point and another to a short, stubby one — same pencil, two different tip angles — then press each into a bit of clay or an eraser with the same push. The fine point sinks in with almost nothing; the blunt one resists and asks for more force. That's the wedge in your hand: a more acute point is a shallower slope, so the material gives way sooner. Later parts reuse the same pencil to watch an edge wear (Part 2) and to test what the material itself will allow (Part 3).
Notice what happens at the extremes. At a very acute angle, the separation forces are large relative to your input — the geometry is doing most of the work. At a very obtuse angle, you're mostly compressing material rather than splitting it. The knife still cuts, but it's working against itself.
Part Two
Think of It as a Hill
There's another way to think about this that makes the geometry immediately intuitive. Instead of thinking about the force the blade exerts on material, think about the experience of the material as the blade passes through it.
The material on either side of the edge has to move out of the way as the blade passes. It has to climb the bevel — the sloped surface on either side of the edge. And the angle of that bevel determines how hard that climb is. A very shallow slope is easy to walk up. A steep slope demands real effort. The material doesn't choose — but the physics is the same.
A more acute blade angle means the material faces a shallower slope. It moves out of the way with less resistance, which means you feel less resistance on the other end. A more obtuse angle presents a steeper wall — the material resists more, you push harder, and the cut takes more effort.
Interactive Diagram
The Material's Perspective — Climbing the Bevel
As you increase the bevel angle, the slope the material must climb steepens. The resistance figure shows the lateral force as a percentage of applied downward load — higher means more effort from you for the same cut.
This is why a razor — which has an almost absurdly acute edge — feels like it cuts with almost no pressure. You're not doing the work. The angle is. And this is why a thick, convex edge on a cheaper knife asks you to push through material rather than slide through it.
Part Three
What This Means
for Every Cut
The practical consequence of this physics isn't subtle. Every day you use a knife, the geometry of the edge is either working for you or against you. A properly ground acute edge moves through material with a lightness that feels almost like the knife is doing the cutting on its own. An obtuse or improperly ground edge makes every task an act of force — and force is where accidents happen, where fatigue accumulates, and where the quality of the cut suffers.
This is why grind angle is the first design decision we make, not the last. Before we talk about steel, before heat treatment, before handle materials — the question is: what angle actually serves the person using this knife for the tasks they'll actually face?
For the MERINO line, that number is 20-25 degrees inclusive — 10 to 12.5 degrees per side. At that angle, the wedge geometry delivers genuine mechanical advantage on every cut. The knife moves through material the way a properly designed tool should: with the geometry doing the work.
The MERINO Grind
20–25° included · 10–12.5° per side
At 20° included: mechanical advantage ≈ 5.7×. At 25° included: ≈ 4.5×. In practice this means the geometry converts the majority of your applied force into separation — the material parts because the physics demands it. Why this range is achievable in CPM S35VN and not in lesser steels is the subject of Part 3.
But choosing the right angle is only the beginning of the story. Because the geometry that makes a knife sharp at purchase isn't the same thing as the geometry that keeps it sharp through use. That's a different problem — and it has a different answer.
Part 2 is about what happens when the edge wears. And why the angle you start with determines how long the knife keeps performing — not just how well it cuts on day one.